

If you’re looking for a show-stopping summer dessert that’s as easy as it is delicious, this easy Brownie Ice Cream Dream Cake is it. With a rich, fudgy brownie base, a layer of creamy vanilla and chocolate ice cream, and a crunchy chocolate cookie center.

This is everything you love about a brownie sundae—just frozen into cake form! Topped with fluffy Cool Whip, colorful sprinkles, and extra brownie chunks.
My Brownie Ice Cream Dream Cake is always a hit for birthdays and special gatherings. And if you’re like me and think one dessert is never enough, try my Chewy Chocolate Chip Cookies.
I made this dessert for a BBQ, and I’m still not sure who had more slices—my daughter or my boyfriend! My daughter has already claimed it as her birthday cake for every year going forward, and for good reason. My boyfriend is obsessed with Carvel cake, so I used that as inspiration but gave it a personal twist with a fudgy brownie layer (my favorite dessert!). The combo of rich brownie, creamy ice cream, crunchy cookie center, and whipped topping is pure frozen magic.
How long should you let ice cream cake sit out before cutting?
You should let an ice cream cake sit out for about 10 to 15 minutes before cutting.
This gives the ice cream just enough time to soften slightly, so you can slice through it without cracking the topping or fighting with a rock-solid middle. Use a sharp knife dipped in warm water for cleaner slices—and wipe between cuts for that perfect presentation!
How far in advance can I make an ice cream cake?
You can make an ice cream cake up to 2 days in advance and keep it stored tightly covered in the freezer.
This gives the flavors time to meld and keeps everything perfectly frozen until you’re ready to serve. Just be sure to wrap it well with plastic wrap or place it in an airtight container to prevent freezer burn and ice crystals.
As an Amazon Associate, we earn from qualifying purchases. This site contains affiliate links.
Helpful Kitchen Tools:
OXO Good Grips Classic Ice Cream Scoop,BlackNordic Ware Pan Springform, 9 Inch, Charcoal
Glad Press’N Seal Plastic Wrap for Food, Griptex Technology, 70 Square Foot Roll (Pack of 1)
Unpretentious Rainbow Sprinkles (2 Cup Shaker Jar) Colorful & Bright Jimmies for All Festive Occasions
Smucker’s Magic Shell Ice Cream Topping, Chocolate Flavor, 7.25-Ounce Bottle
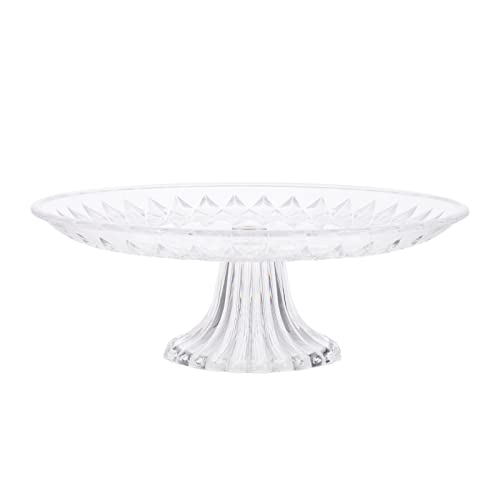
Cabilock Table Candy Clear Fruit Serving Plate Acrylic Fruit Plate Cake Dessert Display Stand Footed Stand Tray for Fruit Cupcake Ice Cream Dessert Salad Food Storage



Main Ingredients:
-
Brownie mix (plus ingredients needed for the box: eggs, oil, water)
-
Vanilla ice cream
-
Chocolate ice cream
- Cool whip
-
Oreo cookies
-
Sprinkles (any fun mix you like)
-
Magic Shell chocolate sauce
Recipe Variations:
You can make this ice cream cake your own by using any flavor of ice cream you like—chocolate, vanilla, cookies and cream, or even a fun seasonal flavor. Top it off with your favorite sprinkles for a pop of color and crunch, and decorate with or without Cool Whip depending on your preference. It’s a versatile dessert that’s easy to customize for any occasion.
Step by step instructions:
1. Bake the Brownie Base
-
Pour a thin layer of the batter (about 1/2 of the batter) into a 9-inch spring form pan lined with parchment paper.

2. Add the First Ice Cream Layer
-
Soften the vanilla ice cream, spread the vanilla ice cream over the cooled brownie layer.

-
Sprinkle half of the crushed Oreo’s over the vanilla ice cream layer. Pour on a generous amount of magic shell.
-
Place the cake back in the freezer for 30–45 minutes to firm up.

3. Add the Second Ice Cream Layer
-
Soften the chocolate ice cream slightly.
-
Spread the chocolate ice cream evenly over the Oreo layer.
- Freeze again for at least 2 hours, or until the ice cream layers are solid.

4. Decorate the Cake
-
Spread a generous layer of Cool Whip (optional if you want extra fluffiness) or leave it plain.
-
Drizzle Magic Shell chocolate sauce over the top.
-
Sprinkle with colorful sprinkles and any extra Oreo chunks you want.
-
Cover loosely with plastic wrap and place the cake back in the freezer for 30–45 minutes to firm up.

5. Serve
-
Let the cake sit out at room temperature for 10–15 minutes before slicing for easier cutting.
-
Use a sharp knife warmed under hot water and wiped dry between slices for clean cuts.

Storage Tips:
-
Freeze until serving – Keep the cake tightly covered in the freezer. Wrap it in plastic wrap and then foil, or place it in a cake carrier to prevent freezer burn.
-
Make ahead – Ice cream cakes can be made 2–3 days in advance and stored in the freezer. Just decorate with Cool Whip and sprinkles right before serving if you want the toppings to look extra fresh.
-
Cutting and storing leftovers – After serving, wrap leftover slices individually in plastic wrap and place them in an airtight container. This makes it easy to grab a slice whenever you want.
-
Shelf life – Best enjoyed within 5–7 days for the freshest flavor and texture, though it will keep in the freezer for up to 2 weeks. The brownie layer may start to dry out if stored longer.
-
Serving tip – Take the cake out of the freezer and let it sit at room temperature for 10–15 minutes before cutting so the brownie base isn’t rock hard.
Brownie Ice Cream Dream Cake

- Prep Time: 2 hours
- Cook Time: 15 minutes
- Total Time: 6 hours total
- Yield: 6 to 8 servings 1x
- Category: Dessert
- Method: Bake/Freeze
- Cuisine: American
Ingredients
-
1 box brownie mix (plus ingredients needed for the box: eggs, oil, water)
-
1 pint vanilla ice cream, softened
-
1 pint chocolate ice cream, softened
- 1 container cool whip, thawed
-
1 to to 1 1/2 cups chocolate crunchies (Oreos, crushed chocolate cookies, or chocolate wafers)
-
1 cup sprinkles (any fun mix you like)
-
1 Container Magic Shell chocolate sauce
Instructions
1. Bake the Brownie Base
Prepare the brownie mix according to the box instructions.
Pour half the batter into a 9-inch springform pan lined with parchment paper.
Bake at the temperature the box suggests, but start checking for doneness 10–15 minutes earlier than the full bake time since it’s a thinner layer.
Pour the remaining half into a small pan, bake, and set aside for topping. Let all brownies cool completely.
2. Add the First Ice Cream Layer
Soften the vanilla ice cream slightly at room temperature for 5–10 minutes.
Spread the softened vanilla ice cream evenly over the cooled brownie layer.
3. Add Crunchies + Magic Shell
Sprinkle crushed cookies/crunchies over the ice cream.
Drizzle generously with Magic Shell and let it harden.
Freeze 10–15 minutes.
4. Add the Second Ice Cream Layer
Soften the chocolate ice cream slightly.
Spread the chocolate ice cream evenly over the Oreo layer.
Smooth the top, cover with plastic wrap, and freeze at least 4 hours or overnight.
5. Decorate the Cake
Spread a generous layer of Cool Whip (optional if you want extra fluffiness) or leave it plain.
Drizzle Magic Shell chocolate sauce over the top.
Sprinkle with colorful sprinkles and any extra Oreo chunks you want.
Freeze for another 30 minutes to let the topping set.
6. Serve
Let the cake sit out at room temperature for 10–15 minutes before slicing for easier cutting.
Use a sharp knife warmed under hot water and wiped dry between slices for clean cuts.


